After getting an Ender 3, my involvement in 3D printing had mostly been confined to printing things off Thingiverse.
Any time I would try to model something in any sort of 3D modeling "CAD" (computer-aided design) software, I'd immediately get lost in the UI.
When I was looking through some 3d models, I was curious about some that could be "customized" with given parameters.
I found out this was mainly done with OpenSCAD. This tool allows you to use code to define the objects you're designing, and let's you use loops, condition statements, parameters and functions to create models. You create customizable models by defining variables that can be altered by the user.
For example, I customized a headphone holder for my desk at work. All I had to do was measure the depth of my desk and provide it to the Customizer.
And this made perfect sense: When you define a 3D model as a function, any user input is just a parameter that you can use to change it.
Here are the basics that I learned to model a few simple things like a marker holder and a board game piece holder for Pandemic Legacy (OpenSCAD also has a great cheatsheet of their own, but it doesn't come with examples).
Basics
OpenSCAD uses its own language, but if you've used any C-like languages (including Javascript, Java or any flavor of C) it should look mostly familiar.
Cube
We'll start with a simple one. The cube function can accept either one integer or an array of three integers which will be used in order for [width, depth, height] (all units are in millimeters).
1cube(3); // => this will create a 3x3x3mm cubeText
Text is also pretty straightforward: The first parameter is the string of text you want to render, and then the other parameters are for options like size, font and alignment.
1cube([50, 14, 1]);23translate([0, 1, 1]) {4 // this function increases the height of the text by 15 linear_extrude(height = 1) {6 text("Hello World", font="Futura");7 }8}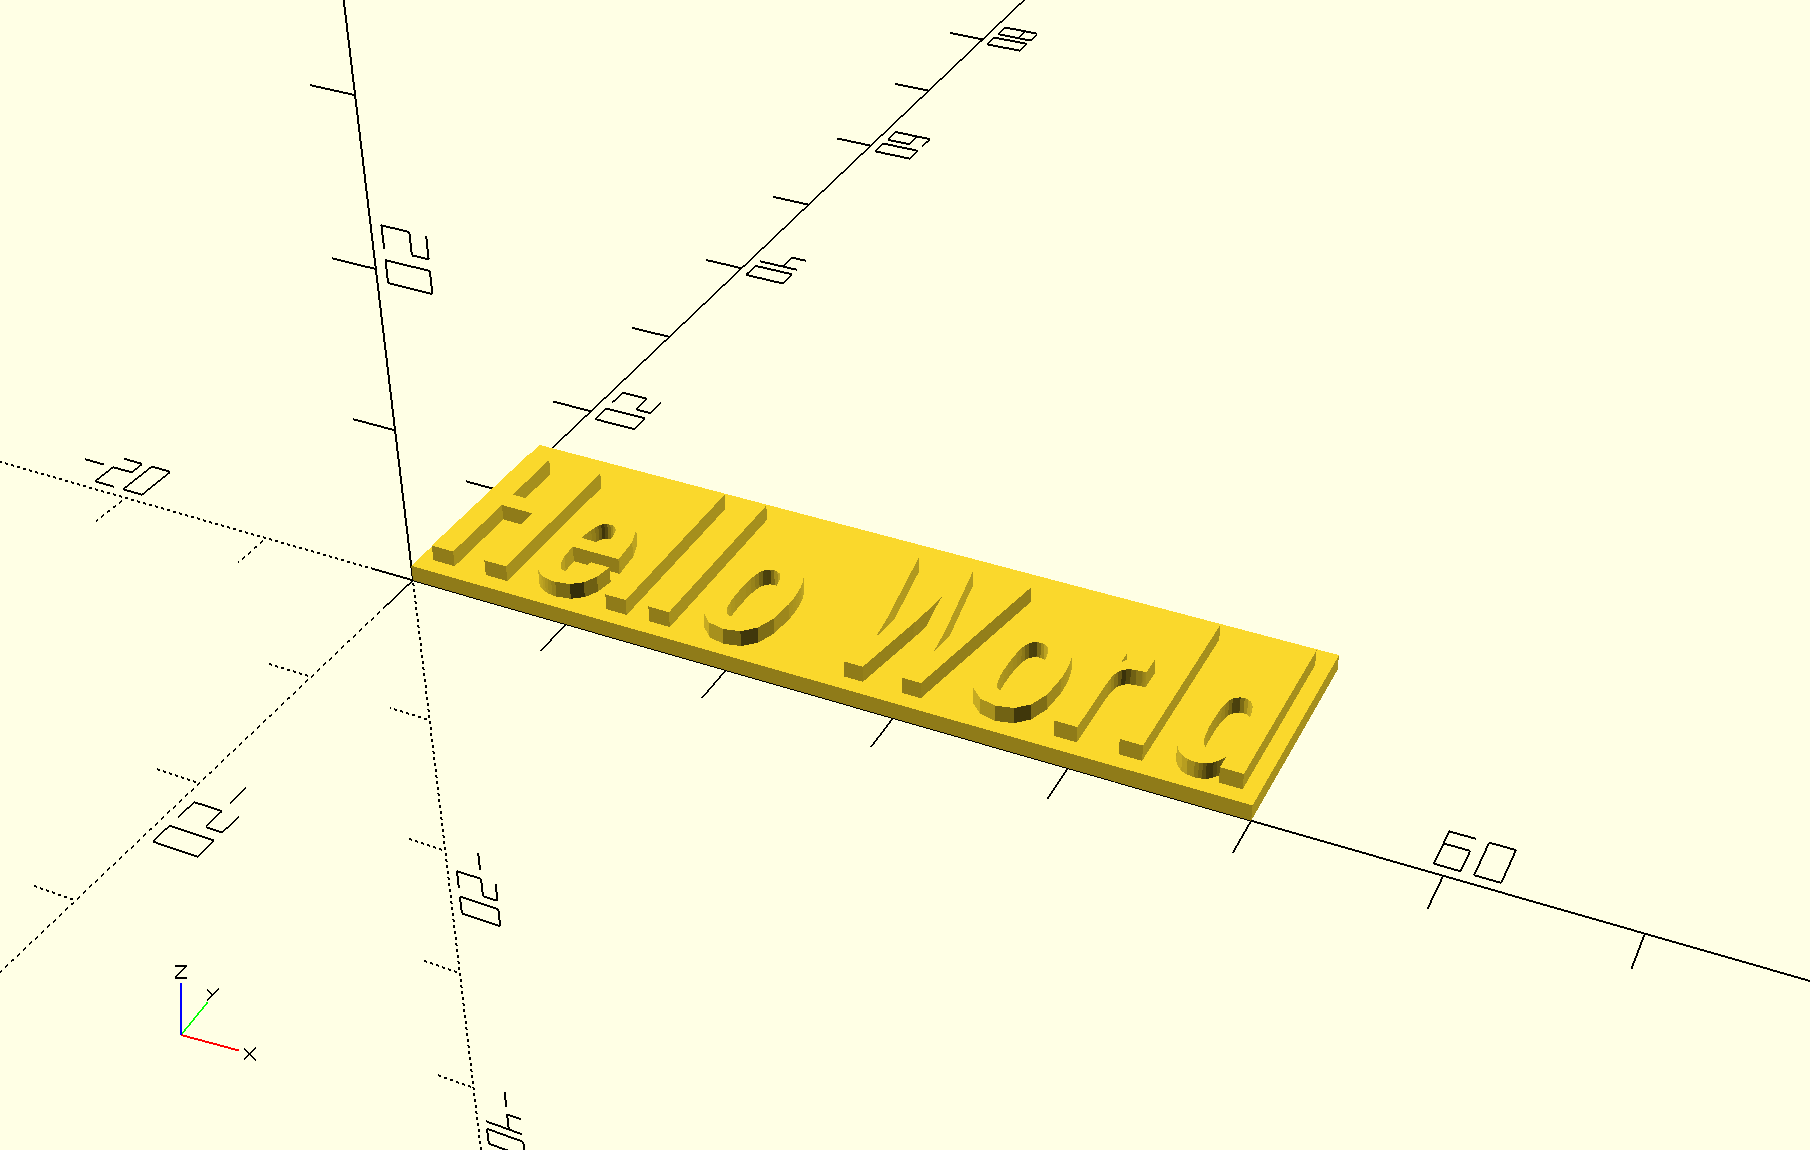
Functions / Operations
There are several common functions that can be used to manipulate shapes into the different models you might try to create.
Translate
Translate is mostly self-explanatory: It will move your object between the X, Y and Z axis in the 3D "space".
1// move the contents of this function 3 mm "forward" along the X axis2translate([3, 0, 0]) {3 cube(3)4}Difference
Let's say you wanted to create a small model to hold things in a box. To create the "opening", you can use the difference() function.
difference() takes the first "shape" that's passed to it and "removes" all the subsequent items.
So if you had a 10x10x10mm cube, you could make a smaller box inside of it to
1difference() {2 cube(10, center=true); // this is the initial shape3 // all items following are "removed" from the initial one45 // so let's make a slightly smaller cube and translate it slightly to be inside the other cube6 translate([0, 0, 2]) {7 cube(9, center=true);8 }9}Putting It All Together
Let's put all these ideas together with an example. We'll and make a tray that holds 18 same-sized board game pieces for the game Pandemic (here's a link to the final result).
After measuring the piece, I found they had these dimensions:
| Dimension | Value |
|---|---|
| X (width): | 14mm |
| Y (length): | 9.5mm |
| Z (height / depth): | 12mm |
To make a bit of room for each piece, we'll round up a bit and use these dimensions for each "space":
1cube([15, 10, 13]);Then we just have to "subtract" that space from a cube:
1difference() {2 // first we'll make the base tray, using these XYZ dimensions3 cube([53, 70, 8]);45 // we'll going to loop over 3 rows (we use 0:2 because arrays start at 0)6 for (row=[0:2]) {7 // and have 6 columns8 for (column=[0:5]) {9 // for the X axis, we're going to space the pieces 17mm apart for each row10 // the `+ 2` for the X axis adds padding on the edges11 // for the Y axis, we'll do the same but space them 11mm apart12 // we keep the Z axis the same since all of the spaces will be at the same height13 translate([row * 17 + 2, column * 11 + 2, 3]) {14 cube([15, 10, 13]);15 }16 }17 }18}Here's the end result:

With some refactoring, I could make this accept variables and hold any number of different-sized board game pieces. But maybe I'll get to that another day.